
| Overview | Analyzing SPACE | Analyzing TIME |
| Analyzing STRUCTURE | Synthesizing IdeaSpaces | Analyzing Learning Activities |
To use the tool, simply go to https://bit.ly/toolaugmentationtool, hover your cursor over the bottom and select the pencil (edit). This will download an editable copy to your desktop. You will need to either download the Diagrams.net app or upload the file to their online app.

This interactive tool will allow you to analyze tools and connect them with tasks.
There are two pathways you can follow through the Tool Augmentation Tool (TAT). If you start at the top and go top-to-bottom and left-to-right, you can plug in the tool and assess its impact on your overall environment. If you do the reverse, you can specify tools that match up with a concise list of tasks that you are trying to augment.
Tools to Tasks
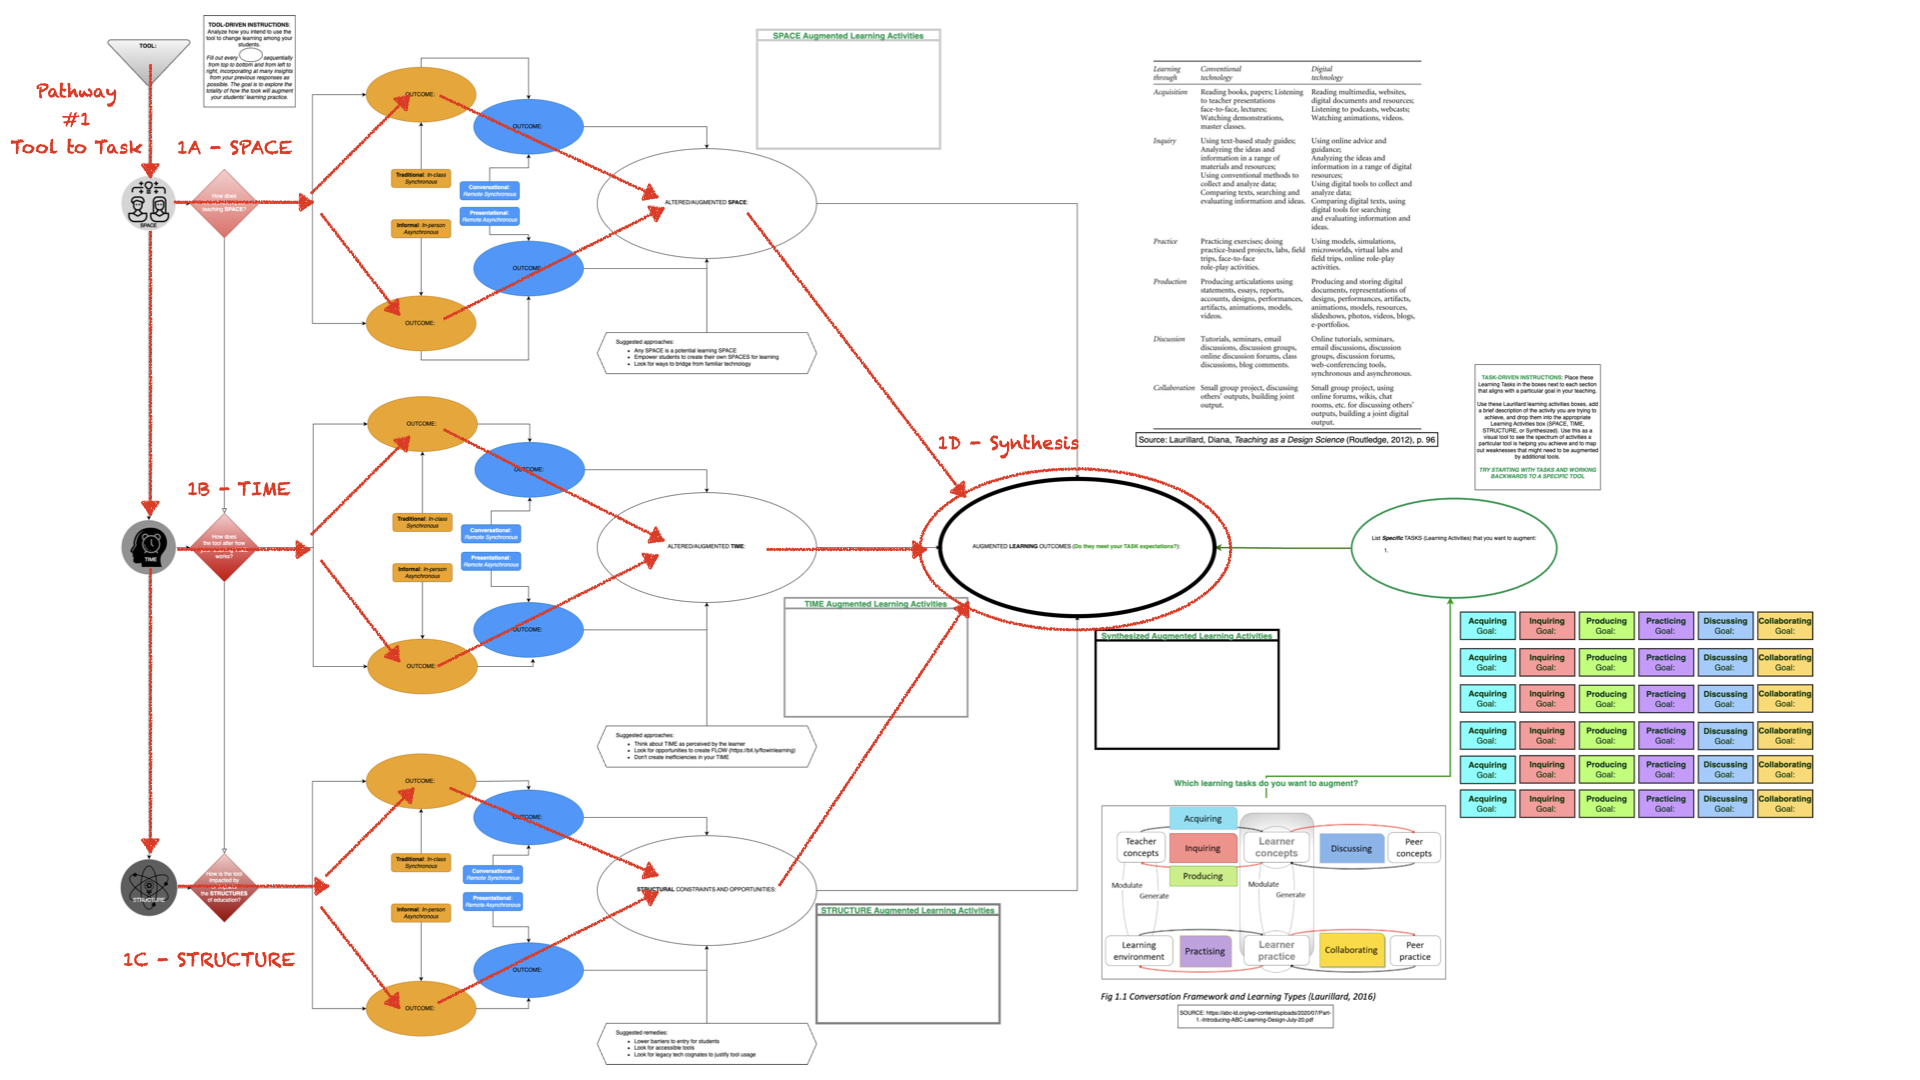
Using the TAT to go from TOOLS to TASKS
You need to have a certain understanding of what you’re trying to achieve to navigate a tool in this way. In this formulation, you would first evaluate SPACE, then TIME, and then STRUCTURE separately. Additionally, you will analyze the four different time-space axes separately.
Most tools impact scenarios differently depending on whether they we apply them physically in the same location or remotely with other people. Furthermore, tools can operate in different ways if a leader or teacher is guiding a live session versus peers operating independently of management. This aspect can also occur in-person or remotely. I break down the time-space continuum into four interconnected modalities.
- Traditional – physically in-person and synchronously led/taught
- Conversational – remote and synchronously led/taught
- Informal – physically in-person but peer-driven asynchronous interactions
- Presentational – remote asynchronous interactions, either individually or collectively
Tools are typically more effective in one modality than others. However, by examining tools in this way, you may discover unexpected applications for that tool by shifting its context. This exercise will also help you consider how to blend environments to complement the use of the tool in different time-space scenarios.
Considering or testing any tool in these four environments can radically alter your perceptions of how the tool can or should be used. This is about breaking it down and putting it back together.
The next step is to synthesize all three pathways (SPACE, TIME, and STRUCTURE) into a holistic analysis. Look for complementary strengths and opportunities during this stage.
Finally, create a list of likely task outcomes for the tool you are analyzing.
Tasks to Tools
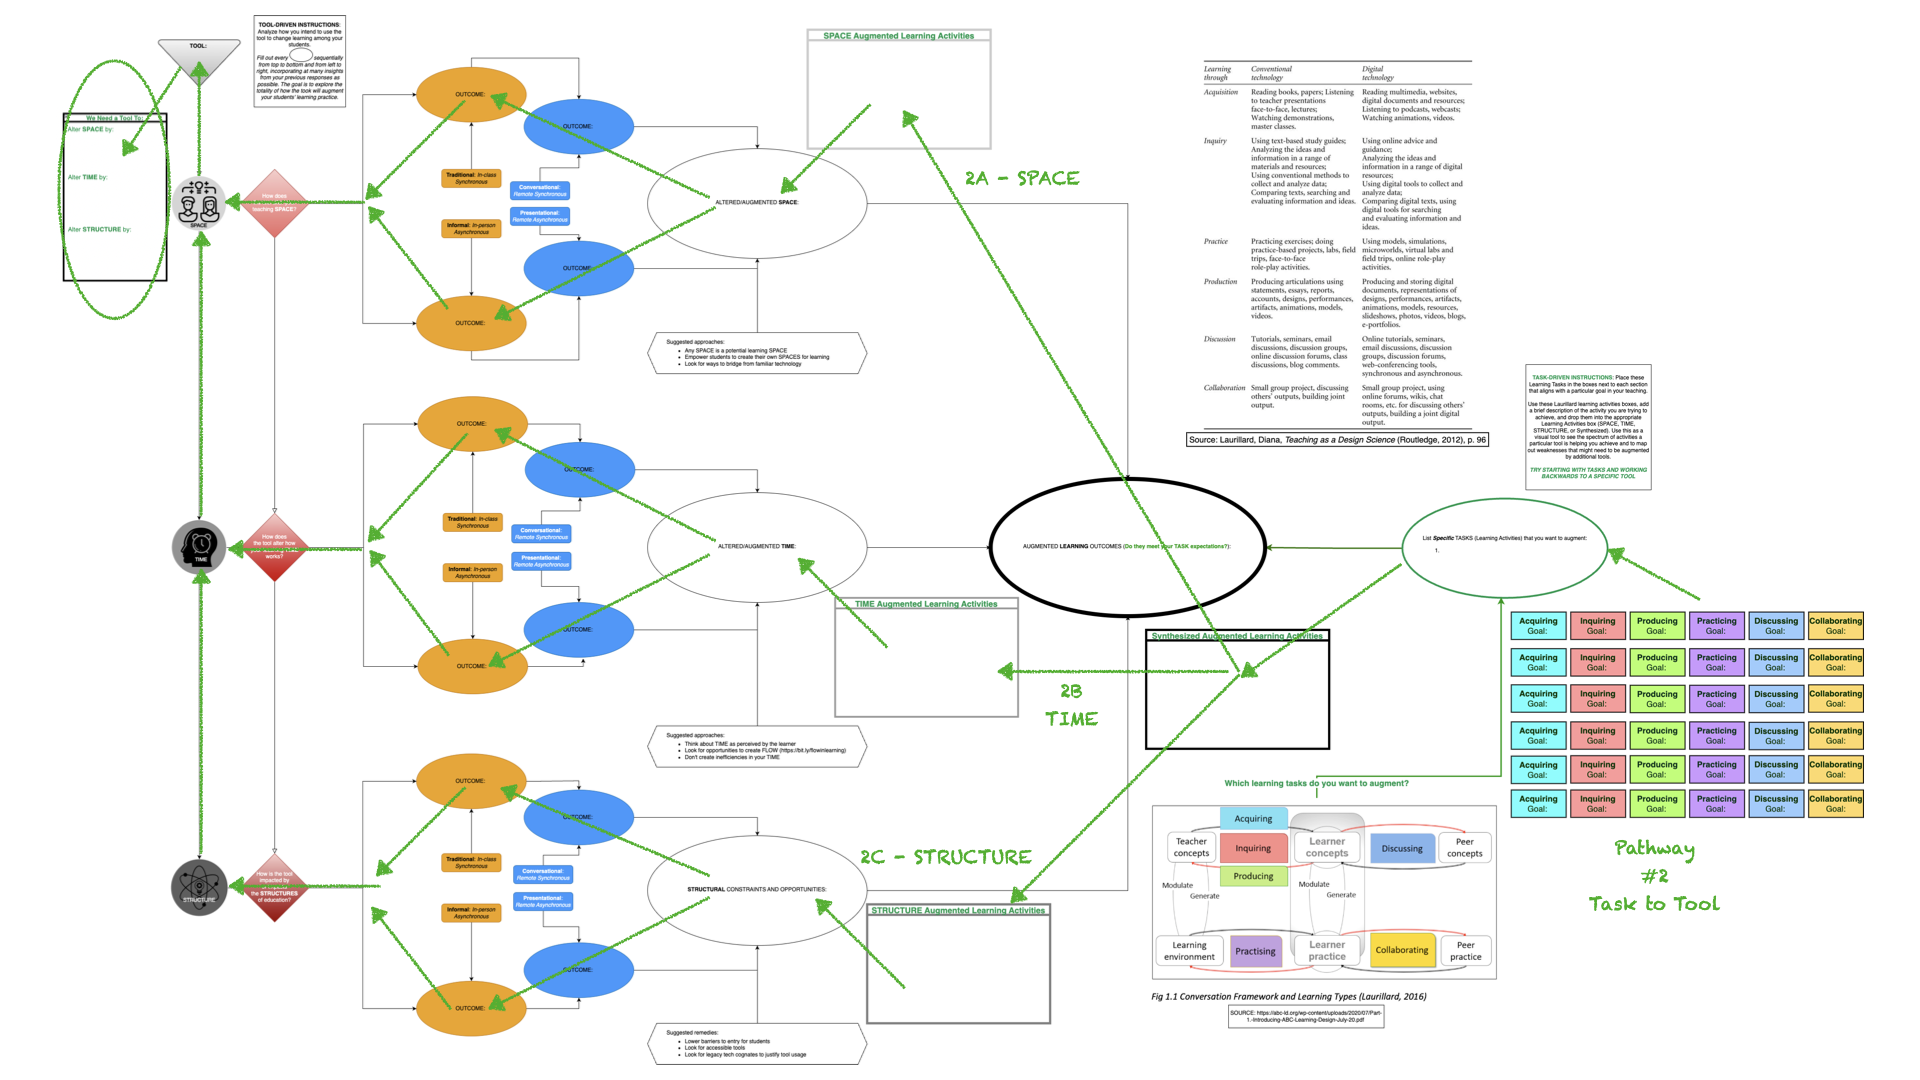
Using the TAT to convert Tasks to Imagine Tools
We can also engage the tool in reverse to convert tasks into a set of tool requirements. To do this, you must first develop a list of tasks that you’re trying to accomplish. A team or individual can create a list of tasks to suit their needs and insert them into the Tool Augmentation Tool working from right-to-left.
The basic framework I’m using, because it fits a wide variety of needs in both teaching and training, is Diana Laurillard’s six learning activities. As a way of creating an application to demonstrate the tool, I added the capability to apply her model directly within the Tool Augmentation Tool.
There are supplemental materials from Laurillard’s work to help you understand how she breaks down tasks of teaching and learning. I have included overviews in the current version of the tool, so I will not go into detail explaining them here. However, this source provides an excellent overview of her model.
I have created a set of tiles on the lower right of the model that you can place into any of the learning activity boxes. Once you have synthesized these tasks, you simply proceed through the diagram in reverse order. Imagine how you might augment SPACES, TIME, and STRUCTURES to maximize what you are trying to accomplish and what kinds of tools might be necessary to accomplish these tasks. This process is explained in detail on the Analyzing Learning Activities instructions page.
Chances are that you are already doing many of these tasks in your work. However, the skillful application of well-designed technology should make those tasks more efficient and allow you to scale or replicate your efforts easily.
As a last step, imagine what the ideal tool for accomplishing your tasks would look like by creating a list of tool requirements you think will enhance your abilities in each of the tasks you have before you. This list of requirements can specify technologies for vendors or as a way of exploring a database like the Emtech instructional technology wiki.
The remaining instructional pages will assist you in going deeper with each of these concepts. I recommend you break these down into a series of exercises that will allow you or your team to explore each concept in detail. This exercise is much about training perceptions of what to expect tools as it is for evaluating individual tools or task sets. Play and have fun.